The Best Exercises For Shoulder Pain

Pain can limit your ability to perform everyday tasks and stop you from doing some of the things you love. Unfortunately, shoulder pain is quite common, and can affect 18% to 26% of adults sometime during their life (via National Center for Biotechnology Information).
Shoulder conditions can be more common as your body ages. Pain in your shoulder can happen all of a sudden, or slowly build over time. Sometimes, it can be hard to figure out exactly what is causing the pain — because everything in your body is connected, issues in other parts of the body, like your neck or back, can radiate into your shoulder and cause pain.
Generally, mild shoulder pain can be managed at home with rest, ice, non-steroidal anti-inflammatory drugs, and gentle stretches. However, if your pain does not go away after several weeks (or it's severe or the result of an injury) it's important to have a doctor take a look to make sure something serious isn't the culprit (via Harvard Medical School).
Tips and cautions before exercise

If you're experiencing shoulder pain, there are a few things you can do at home to help ease symptoms. Penn Medicine recommends icing the area for 15 minutes, then removing the ice for 15 minutes. You can repeat this up to three to four times per day, for two to three days, as needed. Make sure to wrap the ice in cloth or a paper towel — direct contact may lead to frostbite. Use ibuprofen or acetaminophen to help decrease the pain and inflammation.
Many exercises can help stretch and strengthen shoulder muscles and surrounding tendons. It's a good idea to check with your doctor or a physical therapist before starting any exercise program to make sure it's right for you. Remember, if your pain is severe, seek medical attention immediately — and keep in mind that sudden pain in your left shoulder may be the indication of a heart attack.
These shoulder exercises can be practiced three to six times per week to help ease shoulder pain (via Healthline). Start slow and increase your repetitions and length of time you stretch as you feel ready. When stretching, try to relax your shoulder muscles and don't push it — stop the exercise if you feel any pain beyond slight discomfort.
Arm across the chest stretch
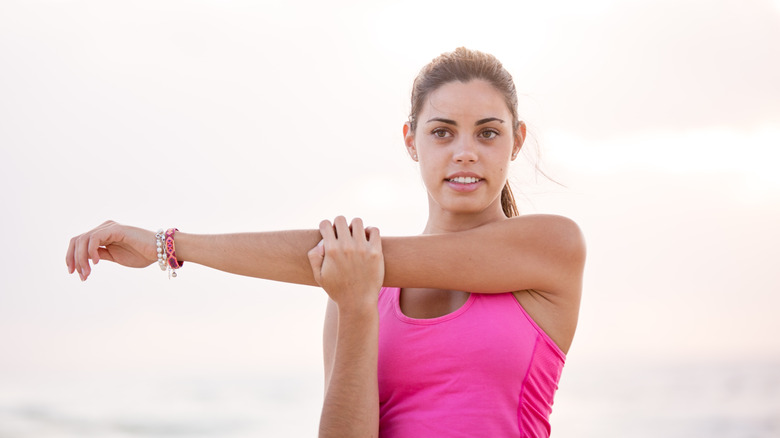
You can perform this stretch while standing or sitting in a chair, whichever feels best to you. Make sure to begin the exercise with good posture. Start by bending your left arm and placing your left hand on your right shoulder, while holding your left elbow with your right hand. Relax your shoulders and pull them down and back.
Then, straighten your left arm, softly pulling your left elbow across your chest toward your right shoulder. Go as far as you feel comfortable, as long as you are not experiencing pain. You should feel a stretch in your left shoulder. Hold this pose for 10 to 30 seconds, or as long as feels agreeable, then release, returning the way you went into the stretch. Repeat the same exercise on the other side — this is considered one repetition. If you can, practice this exercise for up to two to four repetitions (via Harvard Medical School).
Neck stretch

This movement is helpful for releasing tension in the neck and shoulders. You can start standing or sitting in a chair. Slowly lower your chin to chest. You should feel a stretch in the back of your neck. Gently move your head toward your left shoulder to feel a stretch in the right side of the neck and shoulder. Stay here for up to one minute, then slowly move your chin back to your chest, and roll your head to the other side to complete the stretch on the opposite side. Visit each side three to five times.
If you want to deepen the stretch, when you move your head toward your left shoulder, you can place your right hand on your right shoulder and left hand on your head, just above your right ear. Use your hands to lightly lead the movement, but avoid pushing or pulling the head down to get a deeper stretch (via Healthline).
Chest expansion
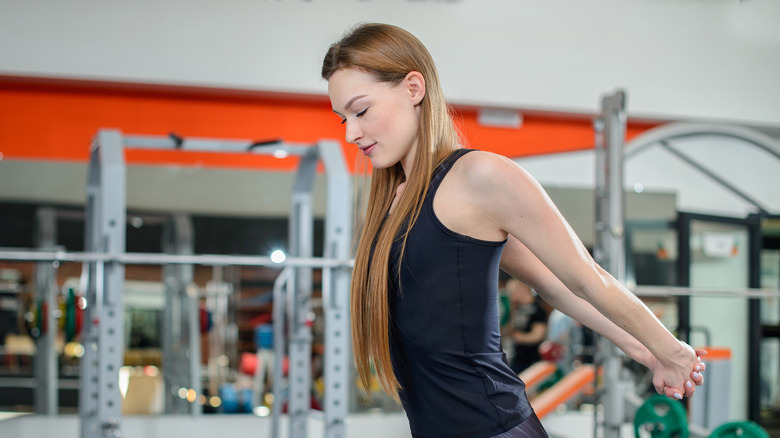
This exercise helps increase flexibility and mobility in your shoulders. It is best to perform while standing. Just clasp hands behind your back. You can also use an exercise band, belt, yoga strap, or towel. If using one of those items, hold it behind your back, grasping the ends with both hands and holding it taut. Try to slide your shoulder blades toward each other to help open your chest as you look up toward the sky. Hold this shape for up to 30 seconds, then release. Repeat this motion three to five times.
If you want to deepen the stretch, you can bring your hands closer together on the strap or towel. You can also play around with moving the band up toward the sky, and back down toward your body (via Healthline). If you can't find a prop, simply interlace fingers behind your back, and slowly lift your hands toward the sky to practice a similar stretch (via Harvard Medical School).
Seated twist
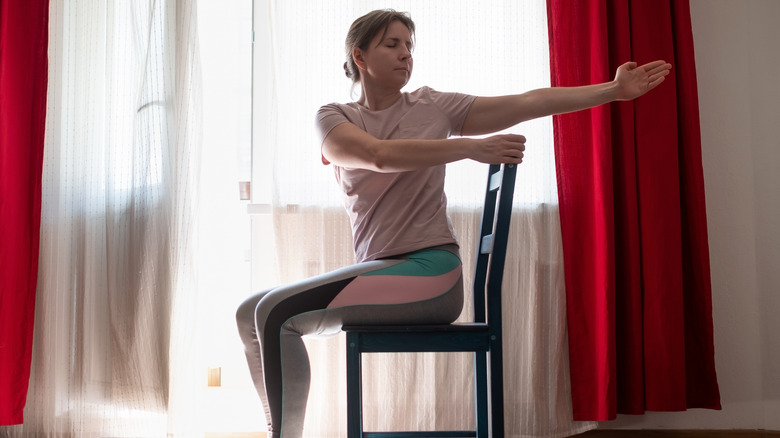
This movement helps stretch your shoulders and neck muscles. Begin by sitting in a chair with your ankles underneath knees and feet parallel to each other. Make sure to twist from your low back and keep your hips facing forward as you move. Slowly twist your torso to the right and place your left hand on your right thigh or knee, wherever it feels comfortable. Your right hand can rest on the chair, right hip, low back, or anywhere that feels good (via Healthline). To deepen the stretch, you can hold on to the chair and push against it to twist your body more (via Yoga Journal).
Try to stay here for up to 30 seconds, and don't forget to continue breathing. When finished, return to facing forward as you exhale, then repeat the exercise on the left side. If you can, visit each side three to five times.
Arm circles
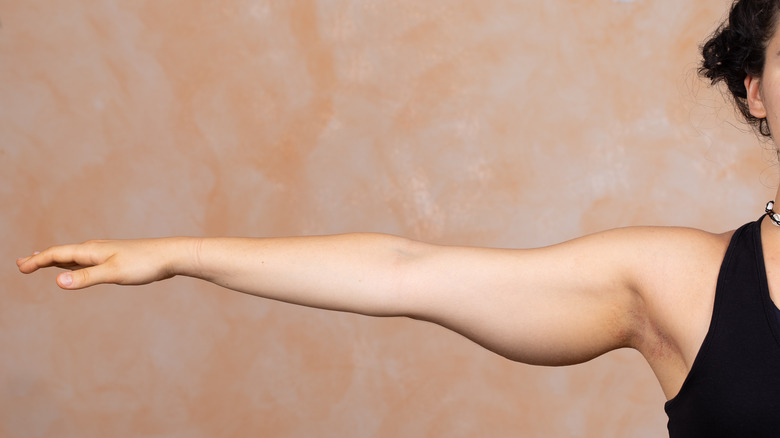
This exercise is a great warm-up for the shoulder muscles and joints. It can help increase flexibility and mobility, and can reduce shoulder pain and tension. Perform this movement while standing with straight posture and your feet about hip-width distance apart — make sure your feet are underneath your hips. Raise both of your arms so that they are in a straight line, making a T shape with your body. Move your arms in a circular motion, like you are drawing small circles with your fingertips. Continue this movement for 10 to 15 seconds, then switch directions (via Medical News Today).
Make intentional, controlled movement, and slowly make the circles bigger until you feel the stretch in your triceps. This simple but strengthening movement will help increase blood circulation, and may help you build up your arm muscles — toning your shoulders, triceps, and biceps (via Healthline).
Cactus wall arms

This shoulder stretch can help open your chest and build up the muscles in your shoulders. You can perform this movement indoors (or outdoors) standing with straight posture and with your back against a wall. Lift your arms up to be in line with your shoulders, so that your body makes a "T shape." Bend your elbows so that your fingertips point up to the sky and your palms face forward. This is commonly called "cactus arms" or "goal post arms," since that's what shape your body looks like.
Gently press the back of your shoulders into the wall behind you, then slowly move your arms up, steadily bringing your fingertips toward each other. Make sure your forearms and upper arms stay touching the wall behind you the entire duration of the movement. If it feels doable without pain, bring your fingertips all the way to touch, then slowly move back down into the cactus arms shape — maintaining connection to the wall with your arms the entire time. This is one repetition. Attempt to do this movement for five repetitions (via Gripped).
Thread the needle pose
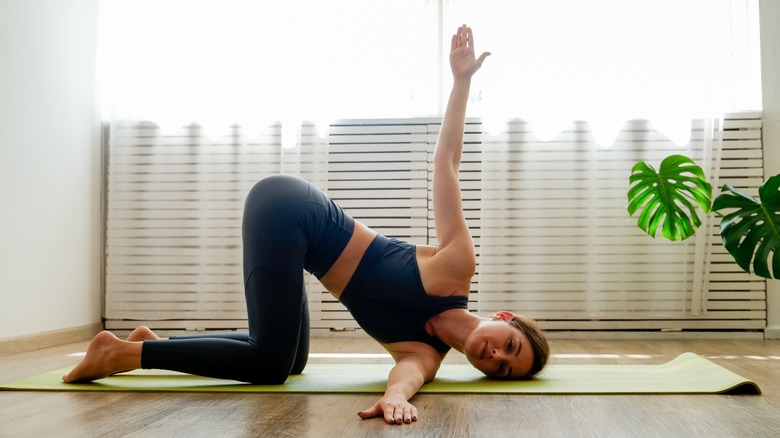
If you've ever practiced yoga, you most likely have done this pose. Thread the needle can help increase movement in your shoulders and upper back. If you have a yoga mat, you'll want to take it out for this stretch; otherwise, you can use a blanket or towel. Begin in table top pose on top of your mat or blanket — your body should look like a table top — so you're on hands and knees, with hands underneath shoulders and knees underneath hips.
Place your right palm in the center of the mat underneath your chest. As you inhale, lift your left arm toward the sky, with palm facing away from you. As you exhale, lower your left arm, moving it underneath your torso, in between your right arm and your legs. Rest your left arm on the ground and slowly lower your left shoulder to the mat, then your head. Rest your left shoulder and the left side of your head on the mat. Your right hand can stay where it is, or if you'd like to deepen the stretch, you can lift your right fingertips toward the sky. Stay here for up to 30 seconds, then return to table top position, and repeat on the other side (via Medical News Today).
Eagle arms
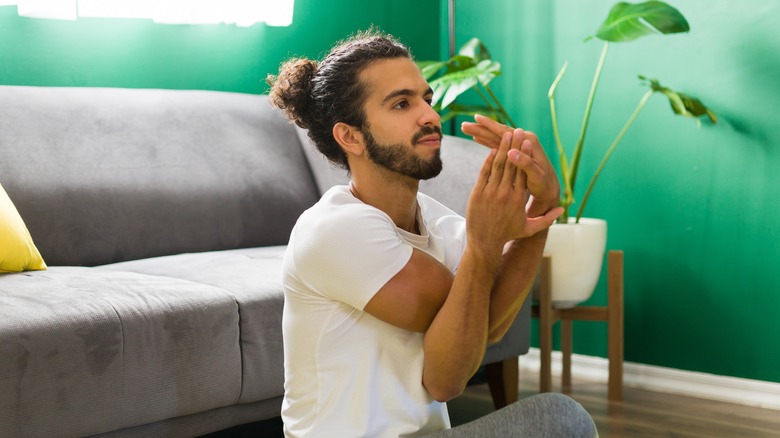
Eagle pose is another traditional yoga pose. Instead of doing the full expression of eagle posture, this exercise focuses on the arms — which offers a big stretch for the shoulders and upper back. You can perform this exercise while standing or sitting, whichever you prefer. Lift your arms and cross them in front of your body with your palms facing toward the ground and your right arm over the left, making an X shape with your arms. Bend both of your arms and allow the backs of your palms to touch.
You can stay here, or twist your forearms so that your palms touch — they don't have to be exactly aligned, but just simply touching in some way. Slowly lift your arms up toward the sky to deepen the stretch in your shoulders. Pause here for up to 30 seconds, then gently release (via Medical News Today). If this pose is too uncomfortable, try placing your hands on opposite shoulders for a similar, softer stretch (via Yoga Journal).
Child's pose
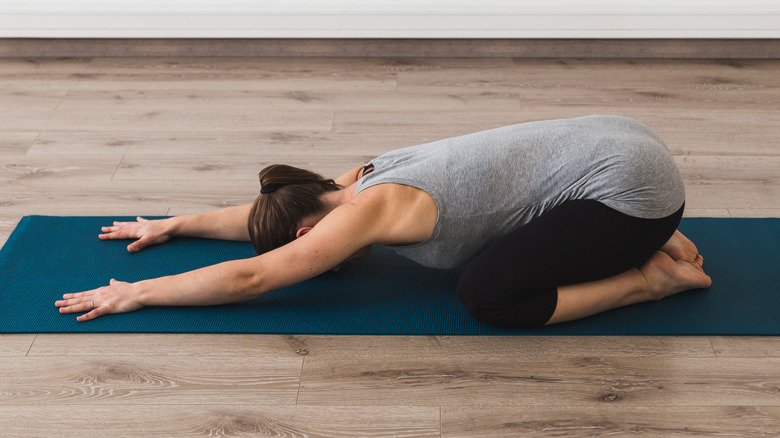
Child's pose is a classic yoga pose that can be very relaxing and calming. It offers a gentle stretch in the back, shoulders, and chest, with a bonus stretch in the hips. This is another exercise you will most likely want a yoga mat or blanket for. Begin on your hands and knees, in table top pose. Move your knees so that they are a little bit wider then hip-width apart. Slowly move your hips toward your feet, so that you're lightly sitting on your heels.
Rest your belly on your thighs and stretch your arms straight, reaching fingers away from your body and resting palms and arms on the ground. Your forehead can rest on the mat or blanket beneath you. You can deepen the stretch by pressing your chest and shoulders toward the ground. Stay in this position for up to 30 seconds, breathing deeply (via Medical News Today).
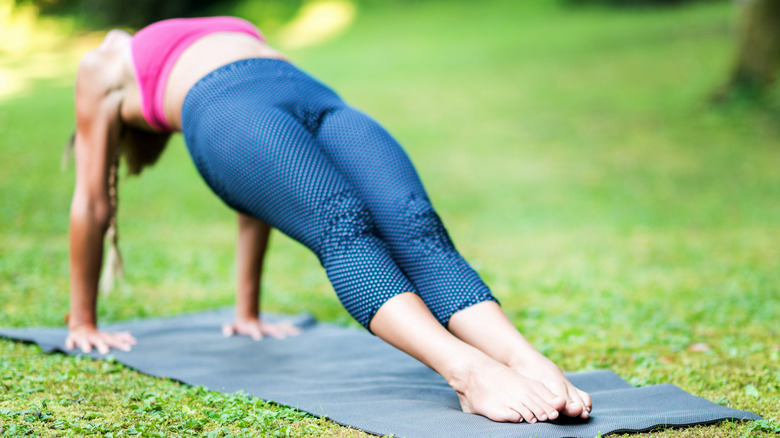
Downward facing dog
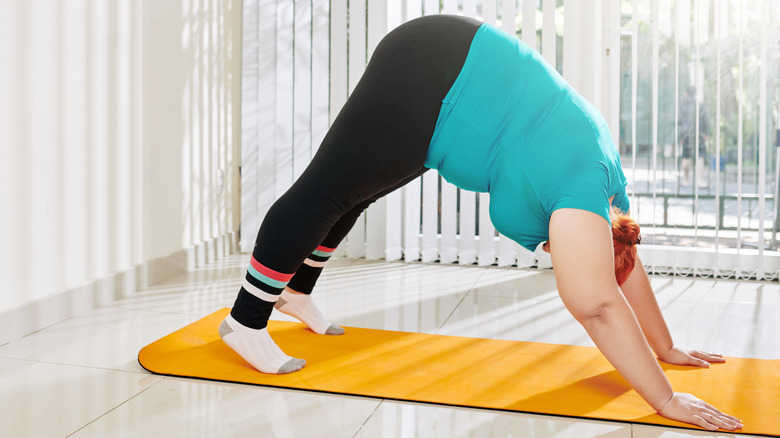
Downward facing dog is also a yoga pose, but it can be a bit more challenging. This posture can help strengthen the muscles in your back and shoulders, while increasing mobility. You will want to practice this pose on a yoga mat. If you don't have one, do this exercise with bare feet on a wood or tile floor — you don't want to use a blanket or something you might slip on. Begin on hands and knees — in table top pose — with your knees under hips and your hands under shoulders.
Press into your palms and begin to lift your knees, extending hips toward the sky. Straighten your legs and reach heels toward the floor, stretching as much as feels comfortable. You can also keep your knees bent if you prefer. Try to stay here for 30 seconds, breathing deeply, then release (via Medical News Today).
Triceps stretch
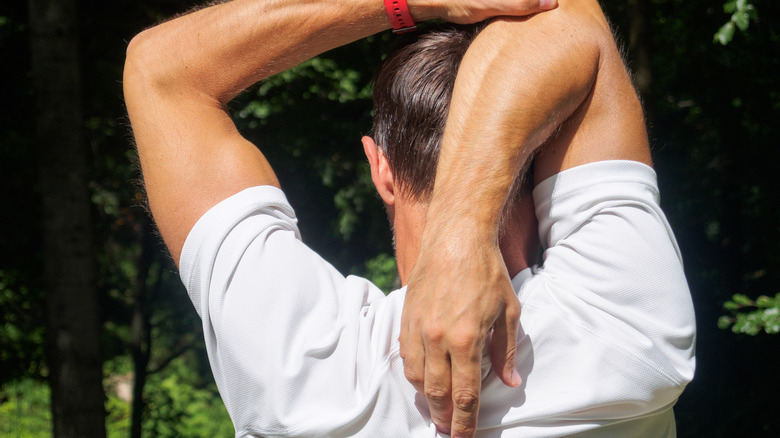
You can practice this stretch sitting down in a chair or standing, whichever you prefer. This exercise stretches your shoulders and the back of your upper arm (your tricep). Make sure to start with a straight posture. Rest your right hand on your right shoulder and hold your right elbow with your left hand. Pull your shoulders down and back, then gently and slowly lift your right elbow toward the sky until it feels tight. You may even want to move your right hand to rest all the way behind the back of your neck or in between your shoulder blades, with your palm touching your body. Pause here for 10 to 30 seconds, remembering to breathe, then release. Repeat this same movement with your left arm. This is considered one repetition. Do two to four repetitions at a time (via Harvard Medical School).
Try not to pull too hard on your elbow, and don't push your upper arm past your ear (via Self).
Reverse plank
This yoga pose is both strengthening and stretching — it will help stretch your front body while building strength in the back body. You will want to practice this pose on a yoga mat or barefoot on a non-slip surface. Start sitting with your legs out straight in front of you. Place your hands on the ground next to your hips, palms face down, fingertips pointing forward. Bring your big toes together to touch — try to keep very little space in between your heels. Flex your feet so your toes are pointing toward your body. Rotate your inner thighs down toward the ground and press your ankles into each other.
Begin to lean back and move your hands about 8 inches straight backward, still keeping your palms face down and fingers forward. Pull your shoulder blades toward each other to lift and open your chest. Point your toes, begin to press into your palms, and lift your hips toward the sky. Pause here for five to 10 breaths, then slowly release back down to the ground (via Yoga Journal).
Bridge pose
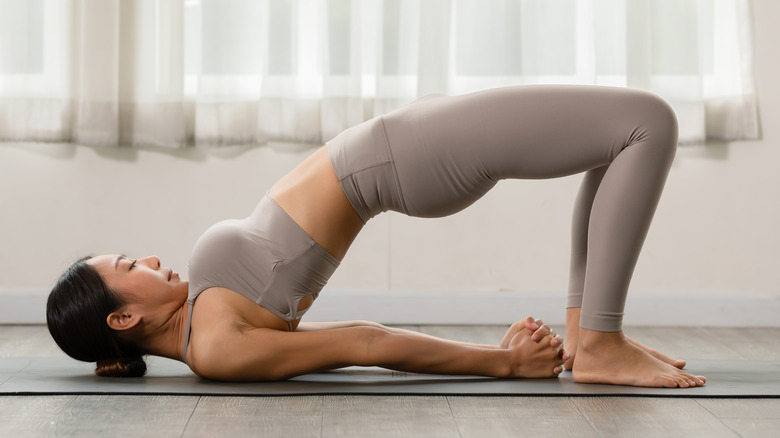
This exercise also involves strengthening and stretching. It is a yoga pose that builds strength in the legs, hips, and glutes, while stretching and expanding the chest and shoulders. This pose can help polish your posture and is great for people who sit for work all day. To begin, lay on your back on top of a yoga mat, or a wooden or tile floor while barefoot. Bend your knees and place your feet on the floor, with your feet parallel to each other and about hip-width apart. Slide your feet close to your glutes, almost to the point where you can touch your heels with your fingertips.
As you inhale, press into your feet to lift your hips toward the sky. Roll your shoulder blades underneath you and interlace your fingers under your body, bringing your palms together to touch. Make sure to engage the muscles in your inner thighs and glutes. Stay here for several deep breaths, then slowly release back down to the ground on an exhale (via Yoga Journal).