How To Use Blocks To Enhance Your Yoga Workout
Susanna Barkataki, an expert yoga teacher, educator, and activist of Indian and British descent, defines yoga as an ancient spiritual practice, founded in India, "intended to prepare the body as a foundation for unity with the spirit." Though most people in the West are only familiar with asana (the physical postures done as part of a yoga practice), there's much more to yoga than just the poses.
Barkataki explains that the purpose of asana is to prepare the body and the mind for meditation. Though asana is not the focus of yoga, the poses are a crucial part of a complete yoga practice. Through embodying the poses and moving with breath, practitioners bring their minds and bodies into unity, which allows them to engage in meditation and spiritual exploration.
For many people, getting into the postures involved in a typical asana practice can be difficult. The idea of using props, like yoga blocks, to modify postures was developed by B.K.S. Iyengar (per YogaBasics.com). Yoga blocks can enhance your practice by giving you more balance, creating a taller surface to reach for when you can't reach your limbs or the floor, allowing you to move into proper alignment in each pose, and preventing injuries that can occur from straining to get into a pose.
Yoga blocks can be used to modify almost any pose. Here are some easy ways that you can start incorporating blocks into your asana practice.
Seated meditation
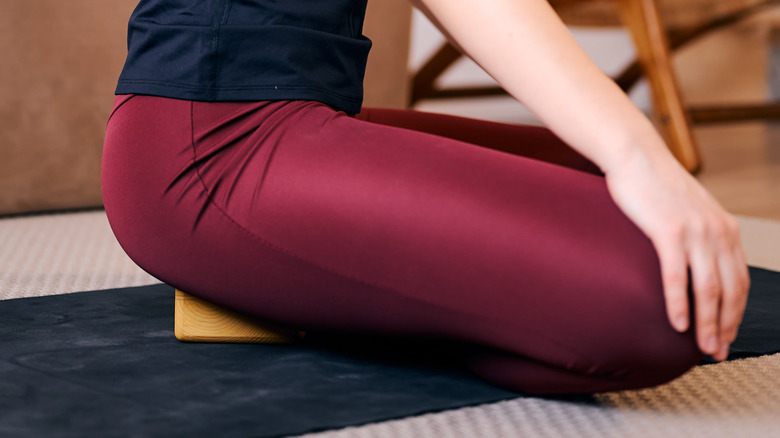
When meditating during yoga practice, you're most likely sitting on the ground with your legs crossed in front of you. According to Prana Sutra, this is called Sukhasana in Sanskrit or Easy pose in English. Though it's called Easy pose, it's not actually that easy to maintain this pose, especially if your hips are tight or you're lacking core strength.
You'll probably find yourself rounding your back or slouching at some point while you're in Easy pose. The pressure this puts on the spine can lead to an achy back, which is the last thing you need during your asana practice. So, it's important to keep the back straight but relaxed while meditating in this pose.
One way to help your body to maintain the correct posture is to sit on a yoga block. The block raises your hips above your knees, which takes some of the pressure off your hips. Be sure to sit firmly and squarely on the block, pressing down through your butt. If you sit too close to the edge of the block, you'll end up leaning forward too much, which also isn't great for your back. For extra comfort in Easy pose, place a yoga blanket under the ankles, and if you have really tight hips, try placing a blanket or blocks under the knees as well.
Child's pose
Balasana, or Child's pose in English, is a resting posture that opens the back, hips, shoulders, and chest. In an article for Chopra, yoga teacher Karson McGinley writes that the pose is achieved by bending the knees and sitting on the shins with the knees together or spread apart, resting your torso on or between your legs, and reaching your arms out in front of you or letting them rest on either side of your body. From there, the chest sinks toward the floor, for a small backbend.
Though Child's pose is often used as a pause after more difficult postures or as a meditative pose, some people find themselves so constricted that it's anything but relaxing. Grabbing some blocks to modify Child's pose can make all the difference.
You can place a block, bolster, or pillow under your forehead, under your chest, or both if you can't rest them on the ground. If you're taking Extended Child's pose, where you reach your arms out in front of you instead of resting them by your sides, you can put a block under each forearm or each hand to increase the stretch in your shoulders and upper back.
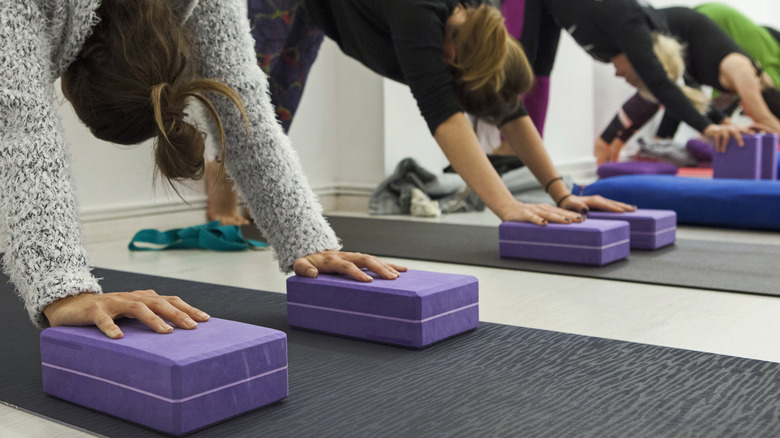
Standing forward fold
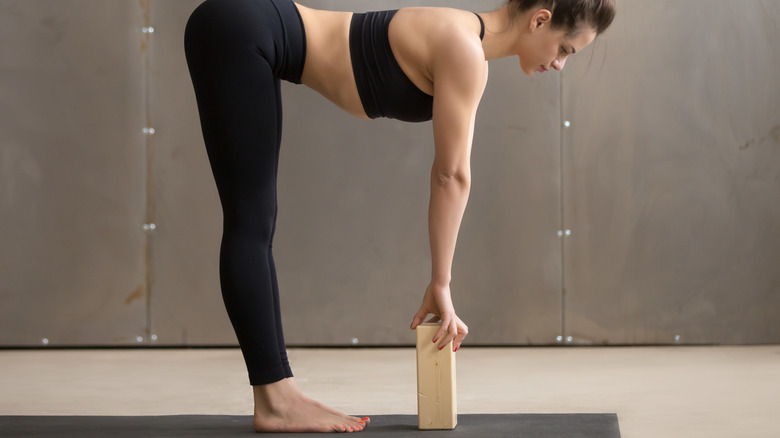
As yoga teacher Charlotte Bell wrote in Hugger Mugger, Standing Forward Fold, or Uttanasana in Sanskrit, is one of the most iconic poses in yoga. Pictures of yoga practitioners bent over with their legs straight and their feet and hands flat on the ground are abundant on social media. However, being able to touch the floor, or even your toes, isn't a requirement for this pose. In fact, the social media perfect depictions of Standing Forward Fold can actually cause back pain and injury for most people.
Using a yoga block is an excellent way to make Standing Forward Fold comfortable while maintaining the proper alignment and getting a good stretch in your back and hamstrings. Before you fold forward, grab a block and place it either between your feet or a little bit in front of your feet.
As you fold, keep your back straight for as long as you can before rounding it to ensure that you're not stretching the back muscles too much. Bring a little bend into the knees if you need to, and instead of reaching for your toes or the floor, reach for the block! Since the block is closer to your hands than the floor, you don't have to overextend your back or your hamstrings reaching for a place to rest your hands.
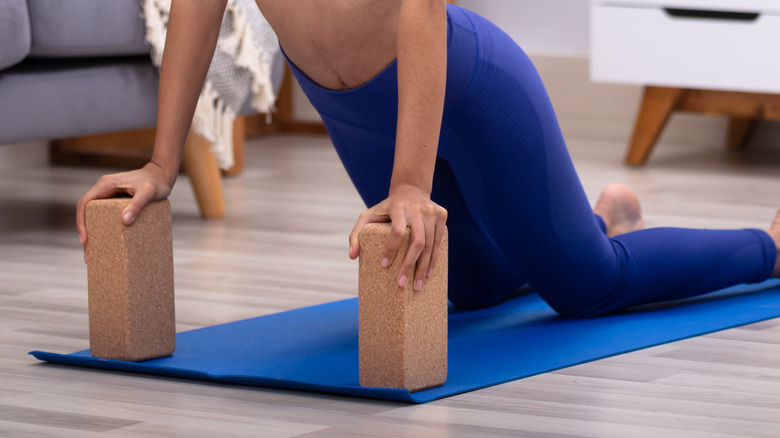
Downward facing dog
Downward Facing Dog pose, or Adho Mukha Svanasana in Sanskrit, is another iconic pose that's part of nearly every single asana practice, especially Vinyasa practices, per Yoga U Online. Though this pose is often done several times in each practice, it's by no means an easy pose. Holding Downward Dog requires upper body and core strength that many yoga newcomers haven't built up yet. Proper alignment is also really important for weight distribution in this pose, but can be tough to figure out without a lot of practice.
To learn the proper alignment and build up the strength required for Down Dog, try adding blocks to the pose. While on your hands and knees, place a yoga block under each of your hands. Then, tuck your toes and raise your hips into Down Dog, pressing your palms firmly into the blocks.
The yoga blocks change the weight distribution of the pose. Typically in Down Dog, your weight is evenly distributed between the legs and the arms, which is tough on the arms. Putting your hands on the yoga blocks shifts the weight back into the legs, taking some pressure off your wrists, arms, and shoulders. The blocks also help you sink your chest down further by creating more space between your chest and the floor. This helps you find the proper alignment through your back.
Extended triangle pose
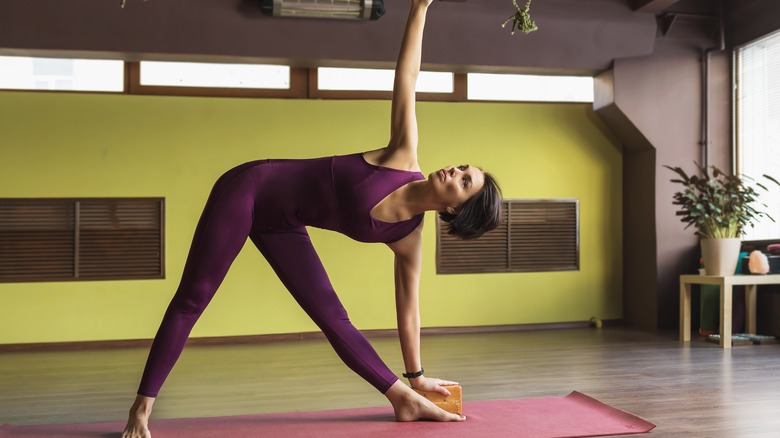
Utthita Trikonasana, or Extended Triangle pose in English, engages the whole body. According to Yoga Journal, this pose opens the chest and the hips, stretches the hamstring and the back, and gets your core firing. However, it can be quite a challenging pose to get into correctly, and it requires quite a bit of strength through the legs, back, and core.
Most people think that the goal of Extended Triangle pose is to get the bottom hand to the ground, but that isn't the case, Iyengar yoga teacher Marla Apt told Yoga Journal. The goal is to create long lines through the legs and the arms to open the hips and the chest. If you simply reach for the ground in this pose without having the musculature or flexibility to do so properly, you'll end up rounding or twisting your back, or both. This means the chest and the hips aren't opening and the arms aren't creating one long line.
The best way to solve this very common alignment problem in Extended Triangle pose is to place a block on the floor next to your front foot, and reach for the block instead of the floor. Since the block is easier to reach, you won't need to bend or twist through your hips or spine. Reaching for the block, you'll be able to maintain the proper alignment and get all the benefits of this challenging but rewarding pose.
Pyramid pose
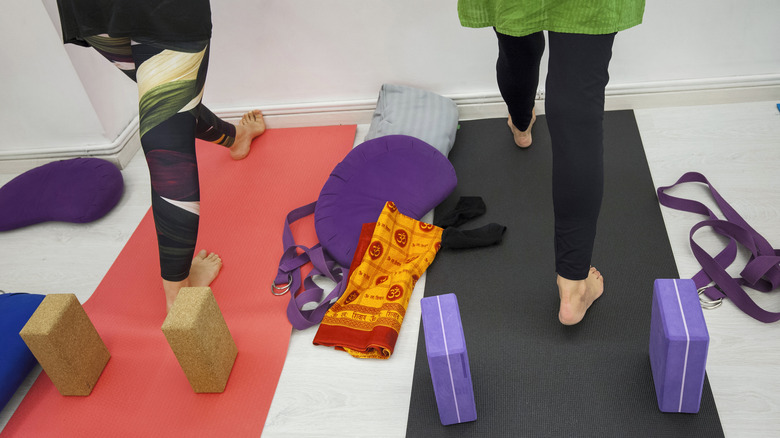
Pyramid pose, or Parsvottanasana in Sanskrit, is a great pose for opening the hamstrings and the hips, according to Yoga Journal. Though it looks like a simple pose, getting into Pyramid while maintaining the correct alignment can be fairly difficult. As with Extended Triangle pose, the goal is to create straight lines throughout the body, not simply bend forward and reach the floor.
Ideally, the back should stay flat as you reach for the ground, without hyperextending the knees. This takes an incredible amount of flexibility in the hamstrings and the entire back. The easiest way to achieve this is by modifying the pose with yoga blocks.
Before you fold forward into Pyramid pose, place a block on each side of the front leg. When you fold forward, hinge at the hips instead of bending forward, and reach for the blocks instead of the ground. Since the blocks are higher, you'll be able to maintain a flat back while still getting all the hamstring stretch you can handle. You can adjust the pose by changing the position of the blocks so they're closer to your hands or closer to the ground.
Pigeon pose
Kapotasana, also known as Pigeon pose, is one of the best yoga poses for opening the hips because it opens both hips simultaneously (via Women's Health). The outer hip of the front leg, which is bent under your torso, gets a great stretch while the hip flexor of the back leg, which is extended out behind you, opens up.
However, as Eve Lynn Chrust pointed out in Women's Health, Pigeon pose can be intense, especially if you have tight hips. If you're having trouble staying in the pose because of tight hips, you can rest the glute of the bent leg on a yoga block to give you some extra support.
If you're starting to progress this pose by folding your torso over the bent leg, blocks can help with that as well! Instead of trying to rest your forehead on the ground or your arms, which requires a lot of back flexibility, place a block under your forehead. You can continue to progress toward resting your forehead on the ground by placing the block in different positions so it's progressively closer to the ground.
Garland pose
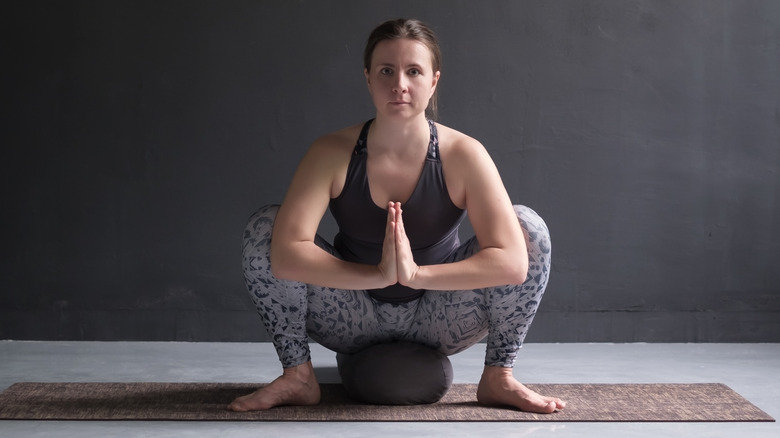
Malasana, often called Garland pose or Deep Squat in English, is a powerful pose for releasing tension in the hips, chest, and back, per Ekhart Yoga. It can be a fairly intimidating pose, though.
Sinking the buttocks toward the floor while keeping the chest lifted and the back straight requires a lot of flexibility and strength. People with tight hips may not be able to get their buttocks lower than their hips, limiting the expression of this pose. Many people who can get their buttocks down past their hips often do so by leaning forward, sacrificing the intended alignment of Malasana. Even those who can get into Garland pose sometimes have trouble staying there for very long.
Using one or more yoga blocks or a bolster for support can resolve all of these issues. Before coming into Malasana, place a block slightly behind your feet, in the middle of your stance. As you lower your buttocks, bring it onto the block. Adjust the block so you can sit comfortably, and then relax into the pose, focusing on releasing tension in the hips so you can lower further.
Start with the block placed in the tallest position and change the position of the block when you can lower further. If you can't sit on one block placed on the highest position or it isn't comfortable, stack multiple blocks on top of each other in any position that works until you feel comfortable and stable in Garland pose.
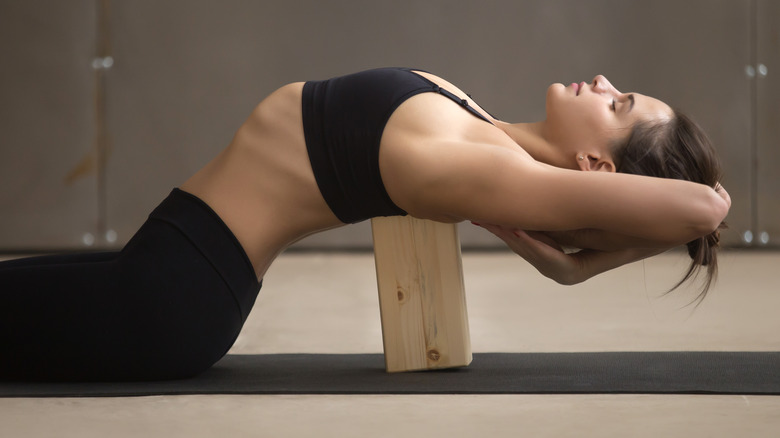
Camel pose
Camel pose, or Ustrasana in Sanskrit, is a deep backbend and chest opener that is excellent for counteracting the typical, slouched forward posture that most of us assume while working at computers or staring at our phones. According to Greatist, when done correctly, Camel pose is great for back pain. However, it's easy to overextend the back and neck in this pose, which can lead to more back pain.
The best way to learn the correct posture for Ustrasana is by starting with a modified version of the pose and building up from there. In the full expression of this pose, you stand on your knees, press your hips forward, arch your back, and reach behind you until your hands rest on your feet. Since this requires a lot of flexibility and strength, it's better to start by using blocks to support your backbend.
Before you come into Camel pose, place two blocks between your feet. Start with the blocks on the tallest setting. As you bend into the pose, reach for the blocks and let your hands rest on them. Focus on tightening the core, pressing the hips forward, and arching with your whole back, not just your low back. If you can't reach the blocks when they're in the highest position, just stack multiple blocks until you can comfortably reach them while bent backwards. Remove blocks or change the position of the blocks as you get more comfortable in the backbend.
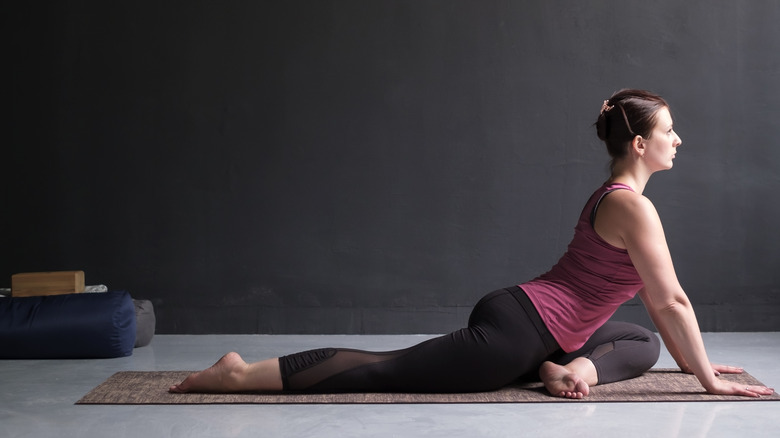
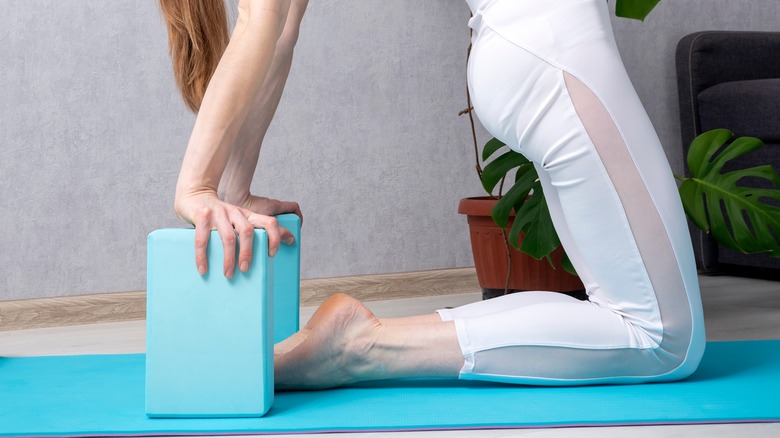
Seated forward fold
Like Camel pose, Seated Forward Fold, or Paschimottanasana in Sanskrit, provides a deep back stretch and can be great for back pain. Proper form is key, though. According to Yoga U Online, a common mistake when coming into this pose is rounding the back. Though rounding the back makes it easier for you to reach your feet, it's not good for your back. You actually want to keep your back straight as you hinge forward at the hips, not bend forward from the waist.
Using a yoga block can help you build up to the full expression of Seated Forward Fold while maintaining the proper form. Start by placing a block between your shins. Since this is closer than your feet and higher than your legs, you'll be able to reach it more easily while keeping your back straight. If you can reach the block when it's between your shins without rounding your back, move the block between your feet. Since it's higher than your feet, you'll be able to reach it even if you can't reach your feet yet.
Once you're able to reach your feet without rounding your back, you'll start to work on moving the torso toward the legs while maintaining proper form. Placing a block on or between your shins and resting your hands or arms on the blocks while you move your torso toward your legs can help minimize rounding in the back as you bend forward.
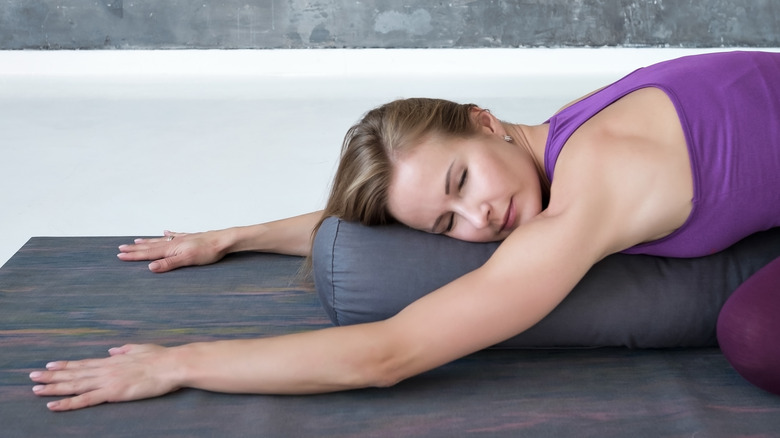
Fish pose
Matsyasana, or Fish pose in English, is another great way to open up the chest, shoulders, and neck. In a blog post for Hugger Mugger, Charlotte Bell wrote that Fish pose is wonderful for anyone who spends much of their time hunched forward, as most of us do these days thanks to technology and office jobs. However, Bell cautioned that the full expression of this pose, which requires a significant bend in the upper spine and the neck, can be dangerous if practiced incorrectly.
Because of this, Bell and many other yoga teachers only teach a modified version of Fish pose using yoga blocks. This supported version of Matsyasana can be done with two blocks or one block and a blanket or pillow. Place one block where your shoulders will land when you lay down on your back. Sit about eight to ten inches in front of that block, and begin to lay back toward the block. The bottom of your ribcage should line up with the edge of the block, and the surface of the block should be between your shoulder blades. Relax your arms and shoulders to open your chest.
Your arms will hang down over the sides of the block, and your head will hang over the top of the block. To support your head and neck, place another block, a rolled-up blanket, or a pillow under the back of your head.
Supported bridge pose
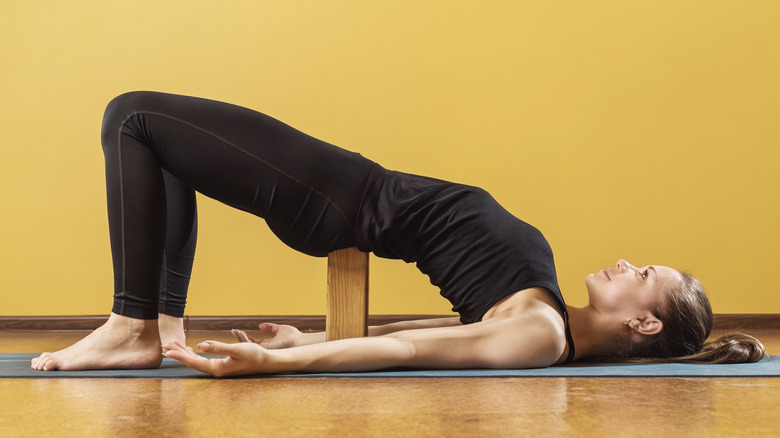
Setu Bandhasana, called Bridge pose in English, is a great pose for building back, glute, and core strength, according to Yoga U Online. Changing the positioning of the feet, arms, and legs targets different muscle groups, so you can choose the muscles you want to work with this simple but challenging pose.
With some blocks, you can also practice a relaxing version of this pose, Setu Bandha Sarvangasana (or supported bridge pose). Women's Health Network offers a few options for setting up supported bridge pose in the comfiest way possible. If you have two blocks, you can lift your hips and slide one block under your hips, then slide one block under your feet. For the most relaxing version of this pose, put the blocks on their shortest positions, and rest your entire low back and your ankles on the blocks.
If you only have one block, slide it under your hips in any position, depending on how much of a backbend you want. You can bend your knees up with your feet firmly on the ground for a more relaxing supported bridge pose. If you want a bit more of a backbend, extend your legs and place your heels on the ground.
Supported shoulder stand
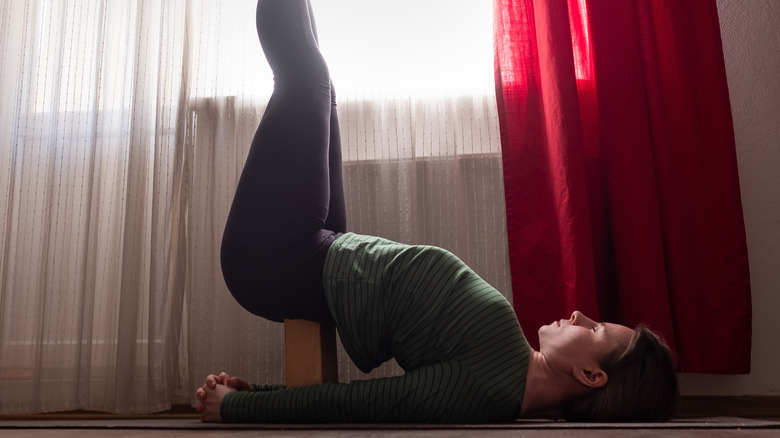
Salambasarvangasana, or Shoulder Stand in English, is a powerful inversion that can improve circulation, calm your nervous system, and strengthen the back, per Yoga International. Unfortunately, it's often practiced incorrectly, which can lead to serious injuries.
Luckily, yoga practitioners of all levels can get the benefits of Shoulder Stand without the risks by practicing Supported Shoulder Stand with yoga blocks. The easiest way to come into Supported Shoulder Stand is by starting in Supported Bridge Pose. While on your back with your knees bent up, press into your feet and lift your hips. Slide a block under your low back and rest your back and hips on the block.
Press your hips and low back into the block, tighten your core, and lift one leg into the air. Then, lift the other leg into the air. Keeping your core tight and continuing to press your back into the block, keep your legs raised as you breathe. Your arms can rest by your sides or bring them out to a T. To come out of Supported Shoulder Stand, bring one leg down at a time.
Challenge: Sun salutation with a block
If you've been doing yoga for a while and you're looking for a challenge, Yoga Journal suggests adding a block to your Sun Salutations. Most of the time when we're adding yoga blocks to our practice, it's to make a posture easier. But adding a block to Sun Salutations makes them a little bit harder, in a good way.
While standing in Tadasana (or Mountain pose), place a yoga block between your thighs. Engage your core, your glutes, and your thighs to squeeze the block and hold it in place. The goal is to keep the block tight between your thighs through the whole flow. And it's trickier than you think! If you relax your hold on the block at any point during the Sun Salutation, it will slip right out.
What's the point of this, other than that it's a fun challenge? Contracting your muscles to hold the block between your thighs actually improves your form during the entire Sun Salutation. The engagement pulls your muscles toward the center of your body, protecting your spine. Holding the block between your thighs trains your body to maintain the same pattern of muscle contraction, even when the block isn't there.