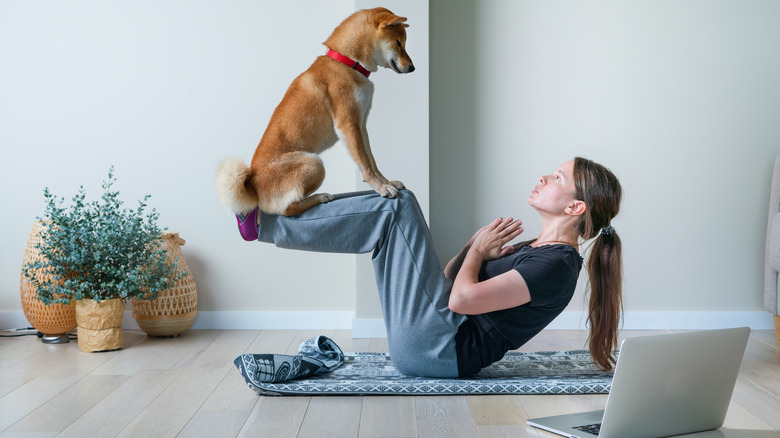
The Best Arm Workouts You Can Do Without Weights
COVID-19 has changed the landscape of fitness in a multitude of ways. Even those of us who used to be obsessed with #gymlife have largely restructured the way we view our equipment needs when it comes to fitness.
As many gyms permanently shutter their doors and boutique fitness clubs raise their prices, many have decided that dedicating to a life of fitness is best done outside of a traditional workout environment. Plus, we have realized that working out in our pajamas is absolutely fantastic. Our living rooms, bedrooms, local parks, and fields have become choice places to get our swole on. While convenient, these locales are less equipped with the iron we love to pump.
Luckily, there are many options for body weight workouts without any of the standard gym equipment. While it is easiest to conceptualize equipment-free lower body workouts, getting that upper body pump is a bit more complicated. However, just because strengthening your upper body at home requires a bit more creativity doesn't mean it is less important. Here are some of the best arm and upper body workouts that you can do without weights (via Health).
Arm circles

While arm circles might not seem like the most obvious way to give your arms a workout, performing them regularly can help you to improve your upper body strength. This is especially true if you are new to exercise in general, not just home workouts.
Arm circles are a great movement to incorporate into your workout because they are straightforward, easy to execute, and can yield substantial strength gains. They are beneficial because of the strength it takes to support the tension of maintaining raised arms. As you get stronger, you can perform arm circles with a different rep scheme pattern, hold them for longer, and begin to incorporate a more isometric focus. Isometric exercises are those that include a strong muscular contraction without the actual action of moving a muscle group through its range of motion (per Medical News Today).
To perform arm circles, stand with your feet hip width apart with a slight bend in your knees — this is your power stance. Gently engage your core by drawing your belly button up and in towards your spine, and then extend your arms out into a T-shape with your hands around shoulder height. Initiate tension and strength through your straightened arms as you begin to move them in circles. For best results, perform three sets of 10 to 20 reps in both directions (via Healthline).
Front raises
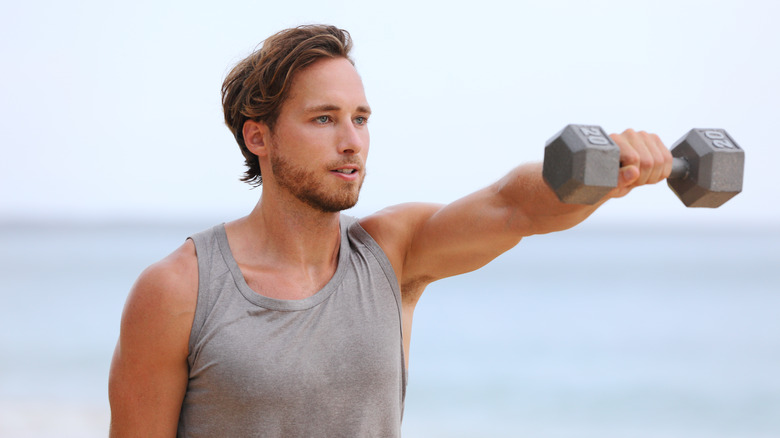
Much like your standard arm circles, front raises seem docile, but can really pack a power-building punch when it comes to working out at home. Front raises utilize your biceps and triceps, which are the front and back sides of your upper arms, respectively. This exercise also engages the deltoid, which is the three-part cap of muscle surrounding your shoulder joint. This is especially true when you are able to engage and increase each muscle group's time under tension.
To perform arm front raises, begin in your naturally-engaged power stance. Leading with your thumbs, lift your arms up through shoulder height and towards the ceiling in front of your body. Once your arms are straightened up by your ears, use control and intention to lower your arms back down to their starting position. By moving slowly and emphasizing that natural energetic tension, you'll be able to feel your muscles engage as they get stronger.
As a standard practice, performing 10 to 20 repetitions over three sets is a great place to start (via Healthline). For an added kick in the pants, you can grab a dusty can of corn from the back of your cabinet and use it as a makeshift weight.
Lateral raises
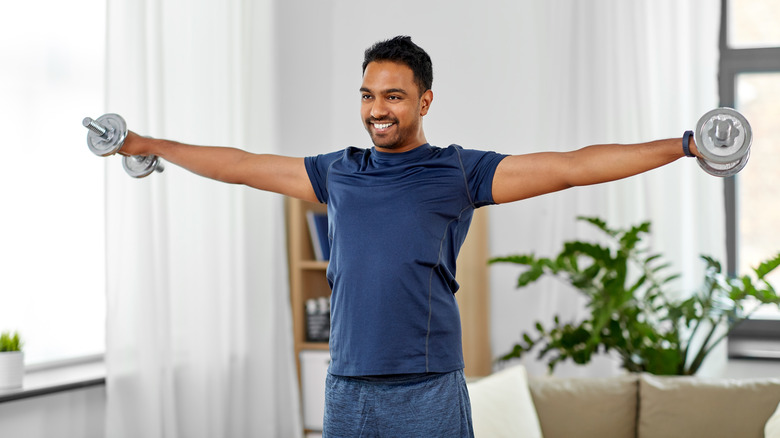
Since arm circles and front raises yield strength gains, it logically follows that lateral arm raises can build strength as well. Like front raises, firing up the right kind of tension while performing lateral raises can engage your biceps and triceps. But since lateral arm raises are performed in a different direction, they initially engage the medial, or middle, part of the deltoid.
To perform your lateral raises, get your power stance in order, and then get down to business. Again, bonus points if you grab a can from your cupboard or a heavy candle to add a bit more challenge. Begin with your arms down by your sides, and with control, lift them up to shoulder height. Keep the tension as you reverse directions and control the arms back down to your sides. Following through with three sets of 10 to 20 reps is a great way to build on your already-impressive strength at home (via Healthline).
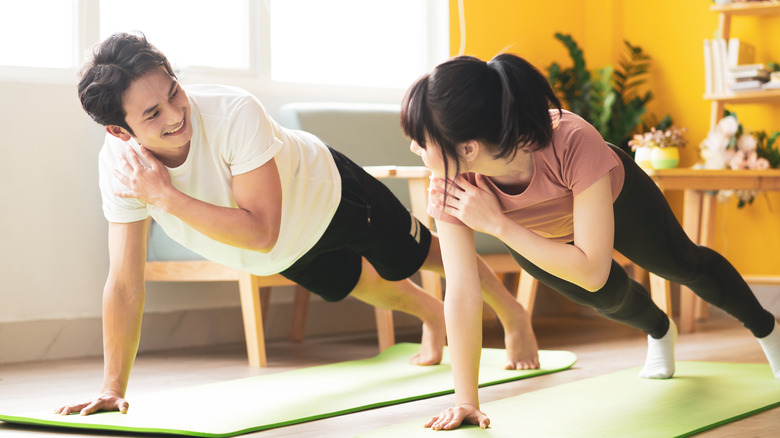
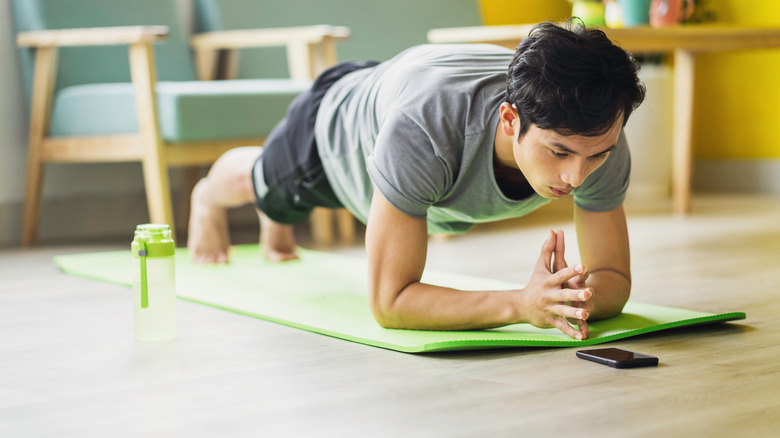
Push-ups
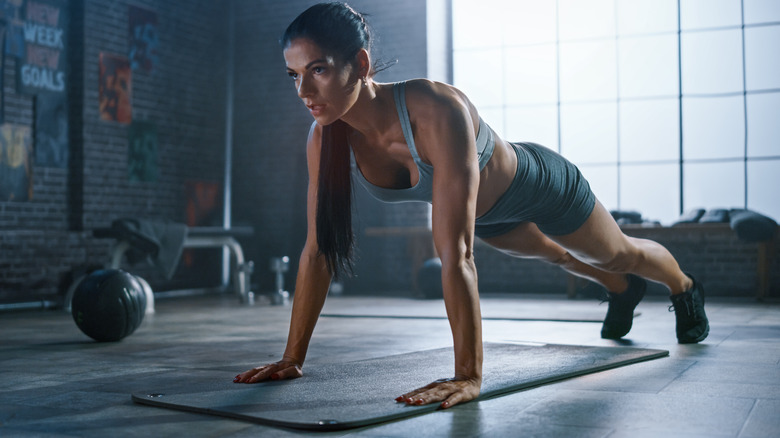
Ah, the almighty push-up. Whether you love them, hate them, love to hate them, hate to love them, or any variation in between, push-ups are known as the queen of all movements, for good reason.
Push-ups arguably target the most muscles in one fell swoop when compared to other exercises. Push-ups mainly target the pectoralis major and pectoralis minor, which are the main chest muscles. But they also hit your core (as you stabilize in your high plank position) and your bilateral serratus anteriors, which are beneath your armpits. Additionally, push-ups work your triceps and deltoids, making it a multi-joint movement that hits a bunch of important muscle groups (via Healthline).
A standard push-up begins in a high plank position with a tight core and even spine. Bend your elbows and lower your entire body down towards the ground, and then press back up. This takes a considerable amount of strength to execute, so it is great that there are so many push-up variations that can lighten (or increase) the intensity of this movement.
Pushup variations
Since standard push-ups can be tricky to pull off with correct form — especially if you are not accustomed to doing them on the reg — it is awesome that there are other ways to incorporate push-ups into your equipment-free upper body workouts.
Wall push-ups are a great place to start building your base (per Self). Instead of starting your push-ups in a plank position on the floor, do it against a wall. The farther back you stand from the wall, the hard your push-ups will be. Start with your feet about hip width apart and palms flat against the wall (shoulder width apart). Control your upper body towards the wall and then press back, repeat, and feel your upper body get stronger!
The next step up would be an incline push-up. This is a great option to perform on the edge of your couch, bed, or a park bench. Take your initial plank position with your hands elevated on the platform of your choosing, and then execute your strong, abdominally-engaged push up from there. If you need a bit more modification, you can lower your knees while maintaining a strong core and perform your push ups from this position. If you'd like to make push ups exponentially more challenging, flip your body so your toes are on the platform and your hands are on the ground. A decline push-up is a very effective way to strengthen your upper body (via Verywell Fit).
Inchworms
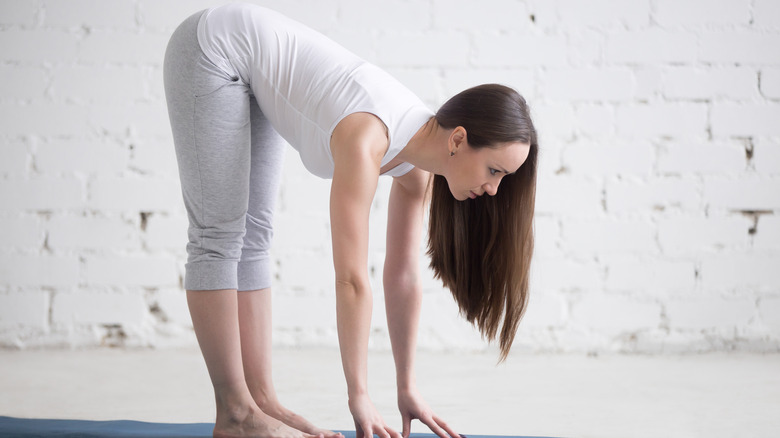
A common concern with equipment-free workouts is that they might not be as challenging, but inchworms are here to put that notion to rest. Inchworms are especially fun and effective because of how dynamic they are (or could potentially be). Not only does doing them engage and ignite multiple different muscles groups, but they can be made to be more difficult.
To perform inchworms, begin in a standing position. Take a gentle bend in your knees in order to get your hands to the floor. Walk your hands forward until you are in a strong, core-engaging plank position. Your options from here are pretty endless. Want to emphasize some core strength? Hold your plank for a few secs. In the mood to work your upper body to the max? Bust out a few push-ups here. Or would you rather give your heart rate a little spike so you can remember what it feels like to be alive? Drive alternating knees towards your elbows and get down with a few mountain climbers.
When you're done with the embellishment of your choosing (or lack thereof), walk your hands back towards your feet. Maintain a strong core as you return to your starting position and then repeat (via Insider).
Triceps dips
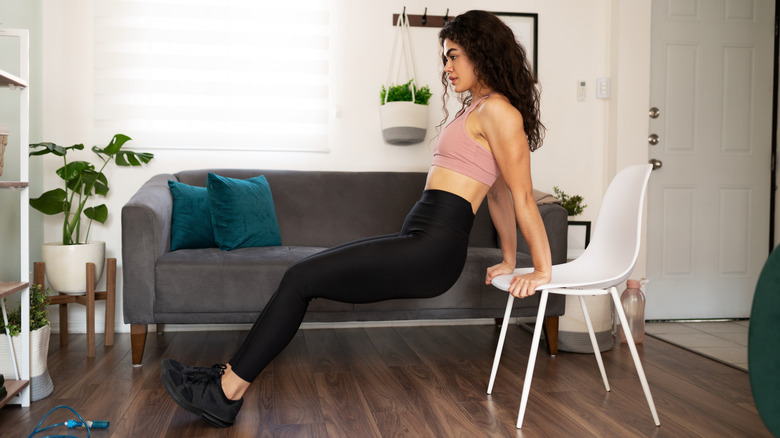
Your triceps are the muscles on the backsides of your arms that aid in the straightening motion of your arms. Triceps dips are a great example of an exercise that can be performed nearly anywhere and at any time. While it does not require weights, it does require some type of platform. You can use a chair, a bed, a couch, a bench — anything that is going to support the weight of your body.
To perform a triceps dip, place your hands on the platform behind you, with the heels of your hands on the platform and fingers facing forward. Ensuring that your elbows are pointing straight back, bend them and allow your body to sink with control towards the ground. Then, press into the heels of your hands to straighten your arms and bring your body back to its starting position (via Insider). It is important to stay aware of where you are initiating the effort from in triceps dips, according to physical therapist and clinic owner Jessica Jones. She explained in an interview with Health Digest that it is all too easy to find yourself pressing back up through your feet, which largely takes your triceps out of the equation.
Side planks
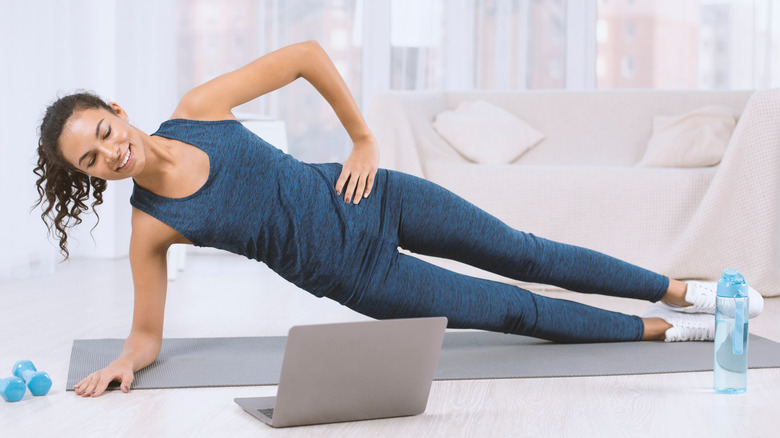
If you think that side planks are a core exercise, you are absolutely core-rect. However, they can also offer some pretty powerful upper body building benefits.
If your core is strong enough to support a side plank on your hand instead of your elbow, you'll love incorporating side planks into your home workout routine. If your core isn't quite strong enough yet, you can always practice your side planks with a knee or foot down on the ground as a kickstand for added support.
By popping into a side plank on your hand instead of your elbow, you can more effectively engage the muscles surrounding your shoulder joint. To safely hold your side plank, make sure that your hand is directly beneath your shoulder, with your fingers facing away from your body. Draw your belly button up and in towards your spine and keep a neutral neck to maintain proper alignment through your spine (via Healthline). You can reach your upper arm towards the sky or place your hand on your hip as you hold for 15 to 60 seconds, depending on how your body feels. Make sure to repeat evenly on both sides to stay balanced.
Forearm plank with arm extensions
The benefits of planking are seriously just unending when it comes to building strength. Not only do planks and plank variations challenge your core and build strength, they can help support your body into proper posture, potentially reduce your risk of back pain, and even decrease your risk of future injuries.
While we know that the core is the main area targeted by planks, they offer great upper body benefits as well, especially when you incorporate arm movements. Planks utilize your large upper body muscles (such as your lats and pecs), but they also reach smaller muscles like the rhomboids, serratus anterior, triceps, biceps, and deltoids (per Healthline).
Jessica Jones, MPT told Health Digest that to add this to your routine, start by finding your perfect plank position on your elbows. Depending on your level of strength, you can start your plank on your toes or on your knees. Make sure that your hips are lifted enough to maintain a strong, straight spine and then with control and even hips, extend one arm and tap the ground in front of you. Return that arm to the starting position and then repeat on the second side.
Forearm planks to dolphin pose
Since we have already determined how amazingly wonderful planking is, it follows that adding some dynamic movements to your planks could offer some serious bang for your buck.
To make your forearm plank a little spicier and put additional muscles to use, you can add the dolphin pose into the mix. While doing this movement, you will be working your pecs, lats, biceps, triceps, deltoids, and of course, your core.
Initiate this movement from your strong forearm plank position. Press into your forearms to pike your hips, creating a V-shape with your body with your head between your upper arms. Pause here and hold for three to five seconds for a bit of a burn, and then return to your elongated forearm plank position (via Insider). Repeating this in sets of ten reps is a great way to strengthen your shoulders and core using only the natural weight of your body.
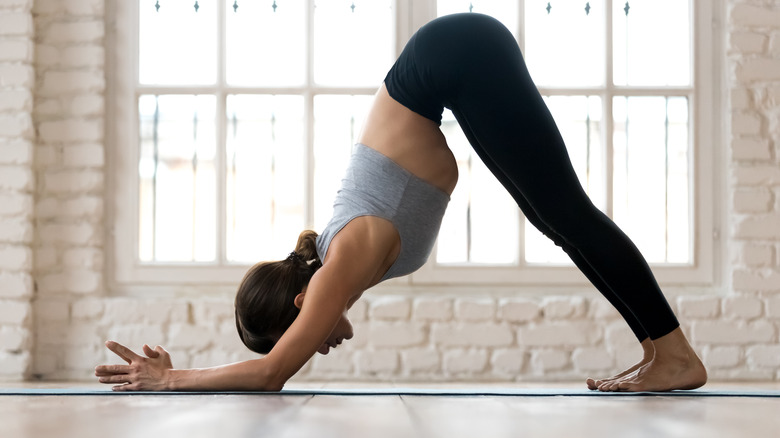
Downward dog variations
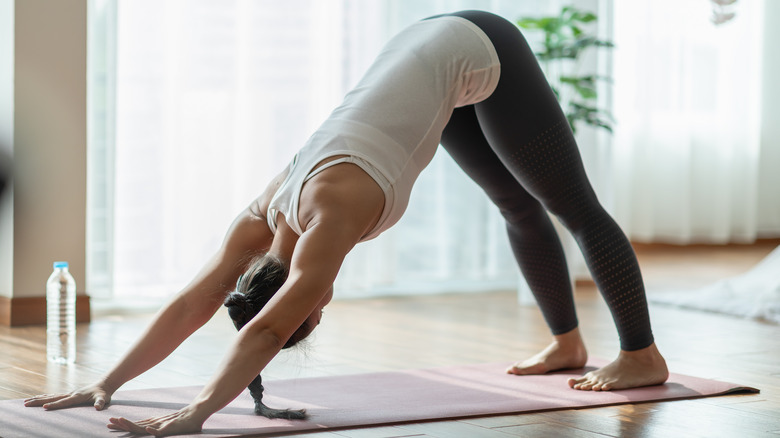
Spending time with your arms supporting the weight of your body is a natural way to build strength. It is no wonder why so many yogis walk about with enviable upper body strength. Simply put, downdogging works. This iconic yoga pose can be especially powerful for building strength when you add in fancy little extras to spice it up a bit.
In an interview with Health Digest, physical therapist and clinic owner Jessica Jones explained that to find your perfect downward-facing dog position, spread your fingers wide and flatten your palms against your mat. Your hands should be a bit wider than shoulder width apart. Send your hips to the sky, making a V-shape with your body. Send your heels down towards the mat behind you, keeping in mind that they do not need to make contact with the mat. From here, this strength building pose is truly your oyster.
You can shift your weight forward into a high plank position, another great place to get creative. You can start by moving from down dog into a plank and then back again to work your chest, shoulders, and triceps (via Healthline). You can also add in some core stabilization by adding ankle taps in your down dog. To perform these, stabilize your downward-facing dog and look back at your ankles. Release your right arm and with control, move it back to tap your left ankle and then switch sides. Continue this alternating pattern for shoulder-building fun (via Jessica Jones, MPT).
Superman swimmers
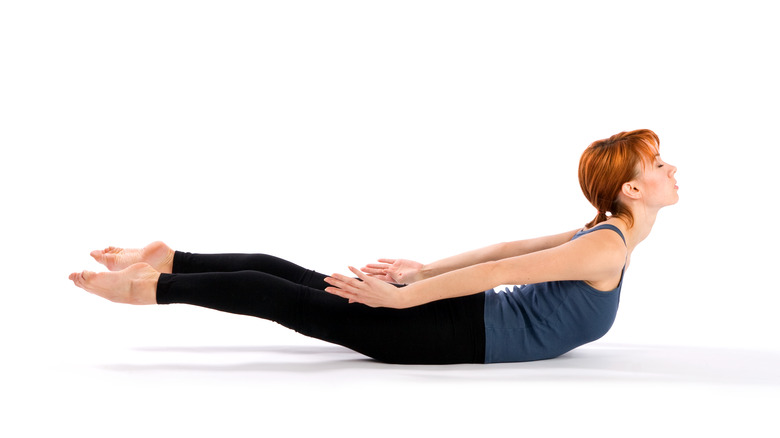
While trainers around the globe might not agree on what to call this movement, they all can agree that it offers some great strength-building benefits, especially when it comes to equipment-free workouts.
To perform your Superman swimmers, begin by lying on your belly. Gently draw your belly up and in towards your spine to create some integrity and strength in the core of your body. Jessica Jones, MPT reminds Health Digest that neglecting that part can ultimately lead to slightly spinal compression, which is definitely something we all want to avoid.
Depending on your level of strength, you can choose what level you start at. If you are just finding your way into exercise, start here by lifting your arms, chest, and shoulders. If you feel strong, you can extend your arms forward into an iconic Superman-flying-through-the-air pose. If you are feeling extra strong, lift your legs up away from your mat and keep them strong and straight. To add a bit of extra shoulder work, you can add in a swimming motion with the arms, hence the name "Superman swimmers." Not only does this movement work your upper body, but it utilizes some deep stabilizers and extensor muscles in your back. Our core is the entire muscular structure in the middle of our bodies, not just the front side. This is why remembering to work these necessary back muscles can lead to such great strength and postural gains (via Jessica Jones, MPT).
Burpees
We hate to tell you that your personal trainer is right about burpees — they are fantastic! Not only do they work your entire body, but they add a heart-pumping element that many other at-home upper body movements might not. By adding in this cardio movement, you will be well on your way to increasing your overall fitness, not just your upper body strength.
There are many variations of a traditional burpee and just as many ways to modify them, depending on your level of fitness and what feels good in your body. Begin your burpee standing up. Then, bend into your knees and hips to get your hands on the ground. Either step or hop your feet back into your high plank position. From here, you can do a push up, you can pause for a moment in your plank, or you can allow your chest and belly to fully make contact with the ground. No matter which option you choose, find your way back into your high plank. To return your starting position, step or hop your feet up to your hands, and then stand up with a jump. Of course, the jump is optional if you are more interested in a low-impact variation of a burpee (via Live Strong).
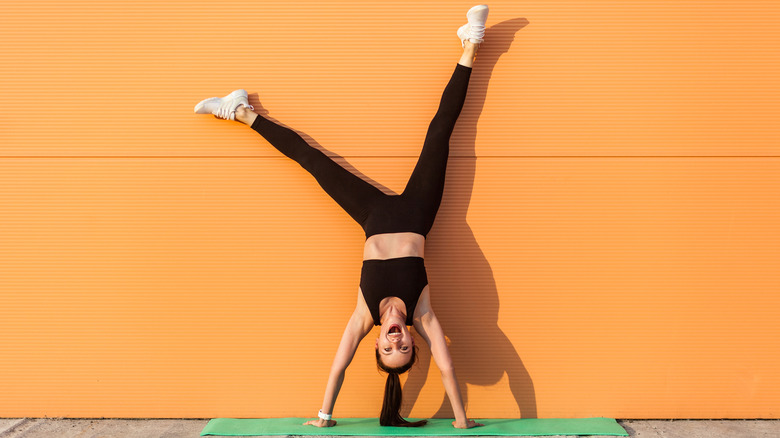
Handstands
Haha, but no one is really incorporating handstands into their workouts, right? Wrong, some people are!
The best part about home workouts is being able to try things that might lead to embarrassment in a public setting. Handstands are a great example of a strength-building move that typically takes some time to learn to pull off. Unless, of course, your name is Simone Biles. (In that case, well, we love you, and that is all.)
Even when practiced against a wall, handstands effectively target your lats, pecs, traps, delts, and more. Getting upside-down and maintaining that position works nearly every muscle in your core as well. All of these muscles work when you practice kicking up into handstands on the reg. But to fully engage them and make them stronger, finding an isometric handstand hold is king (via Live Strong). Once you dial these in, you and all of your upper body strength will be walking across your living room on your hands in no time!